Giving a lecture
To stand in front of the students and give a lecture grouped into meaningful units, enhanced by your experience, examples and illustrations - this is the foundation of many courses at MU. Try to become like YouTubers, or more accurately IS-Tubers for a while and prepare videos for students to watch and listen at any time. The basic techniques are presented in the video:
Teachers’ experiences and tips
Inspiration and methodology
When creating video recordings of lectures, it is good to keep in mind that you are primarily creating quality teaching material. What works for You in the classroom during the lecture may not work well in the video. Always try to imagine the student who will be playing your record in the first place and answer the following questions yourself:
Will the video lecture be clear for the student?
If You run from slides to the board, return to the show or play videos and show other material outside of your slides, this can be a problem. During the lecture, students orient themselves and keep up with you. In the video, You need to have a better planned continuity and avoid jumping between slides and searching for files on your computer. Don't be afraid to write a syllabus in advance or divide the explanation into several individual videos.
Can I keep students' attention?
When watching a video lecture, it is much more difficult for students to stay focused and focus on the interpretation, especially on a difficult topic. Students also tend to approach the interpretation more superficially and not take the topic seriously. If You speak to a computer and not to real people during the explanation, Your speech may be monotonous. It will be even harder for students to concentrate. In the absence of students to speak to, some teachers slip to read slides or read their notes. All of this makes it difficult for students to focus on difficult topic.
What will help keep students' attention? First, try to divide the lecture into individual units and smaller videos. Shorter videos can help keep students' attention. Secondly, think about what makes the lecture special – with a video, a short online interview with an expert, a joke.
Third, articulate more strongly, focusing more on your voice. If it helps, lecture while recording for someone from your family, friend or even a dog. When You speak to a living person, the speech will be different.
Am I really saying the essentials?
Distance learning is in itself demanding in terms of attention and time. Students are often overwhelmed by text materials, exercises, assignments and video. Their time "at home" is seemingly endless, so sometimes teachers tend to provide them with as much material as possible. The role of the teacher is, above all, to help students orient themselves in all those materials and resources and know what is essential and what is not. Say the essentials in the video. Don't focus on having your lecture exactly 1:50:00, but on making it really important to understand the topic.
Also keep in mind that you are not making a film, but a quality teaching material. Splashes, pauses and fill words, etc. belong to this, do not try to fight them with difficulty and spend time cutting or rewinding. Please correct only videos that contain a factual error or misspelling that would confuse students.
Instructions and tutorials
-
I'll make audio for my Powerpoint presentation
The Powerpoint presentation, which contains structured notes, illustrations and examples, accompanies most teachers at MU during their lectures and works well if you are just getting started with remote teaching.
Required equipment
- PC/laptop (Windows or Mac OS)
- Microphone (built-in, external, on headphones)
- MS PowerPoint (part of university's Office 365)
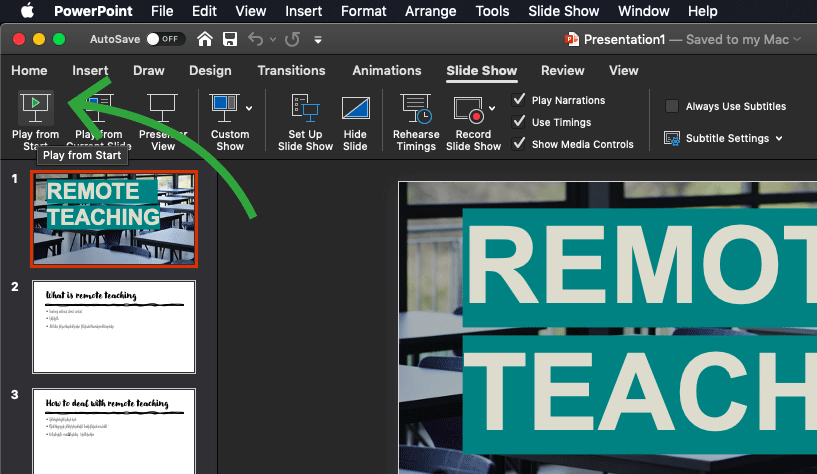
Open your presentation in the PowerPoint application
Proceed to tab Slide Show and click the option Record Slide Show

Make sure that the microphone is not muted in the system, optionally turn on and correctly aim the webcamera and click on the record button
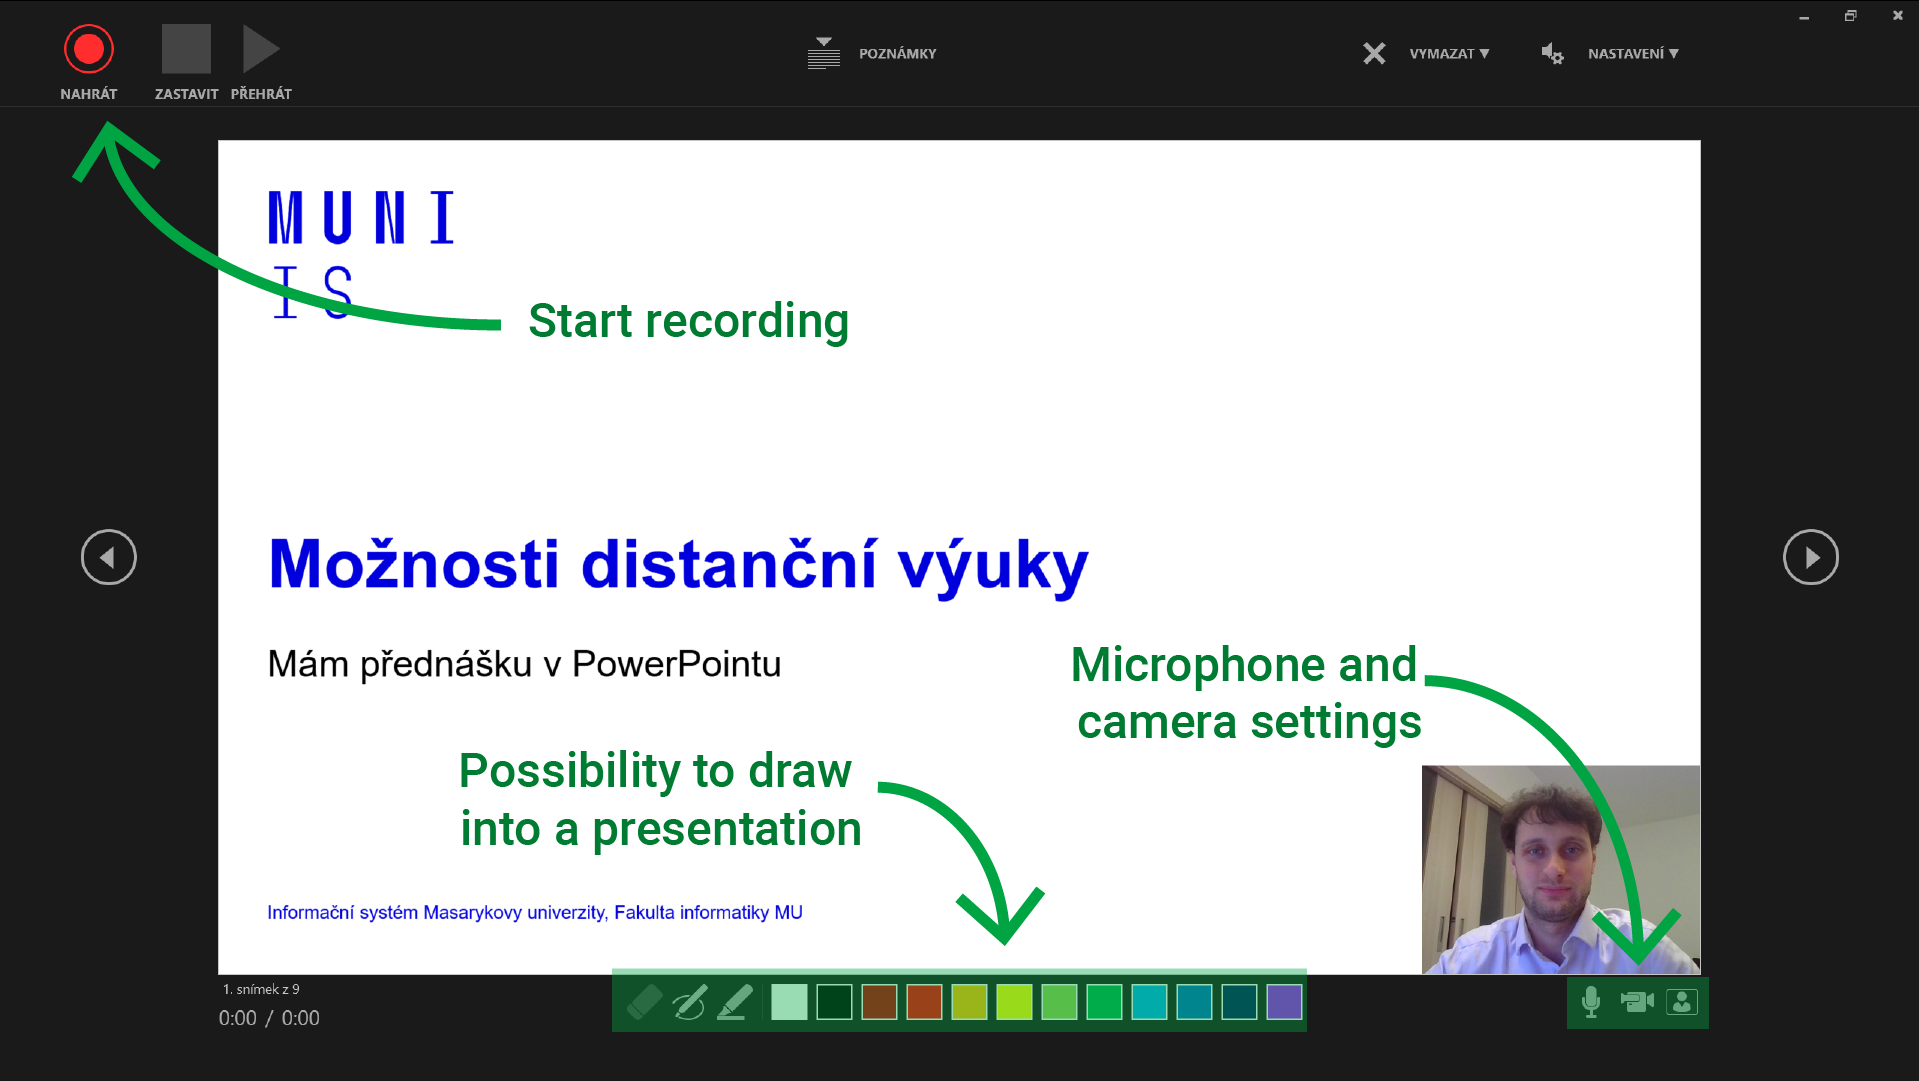
After pressing the record button speak to the microphone and move forward through slides as you would at normal lecture
At first try to record a short sequence to make sure everything is working as it should be!You can manually stop recording by clicking on the stop button, or the recording ends automatically after going through the entire presentation
Save the presentation - you can now share the presentation and play it through the PowerPoint application, including video and commentary
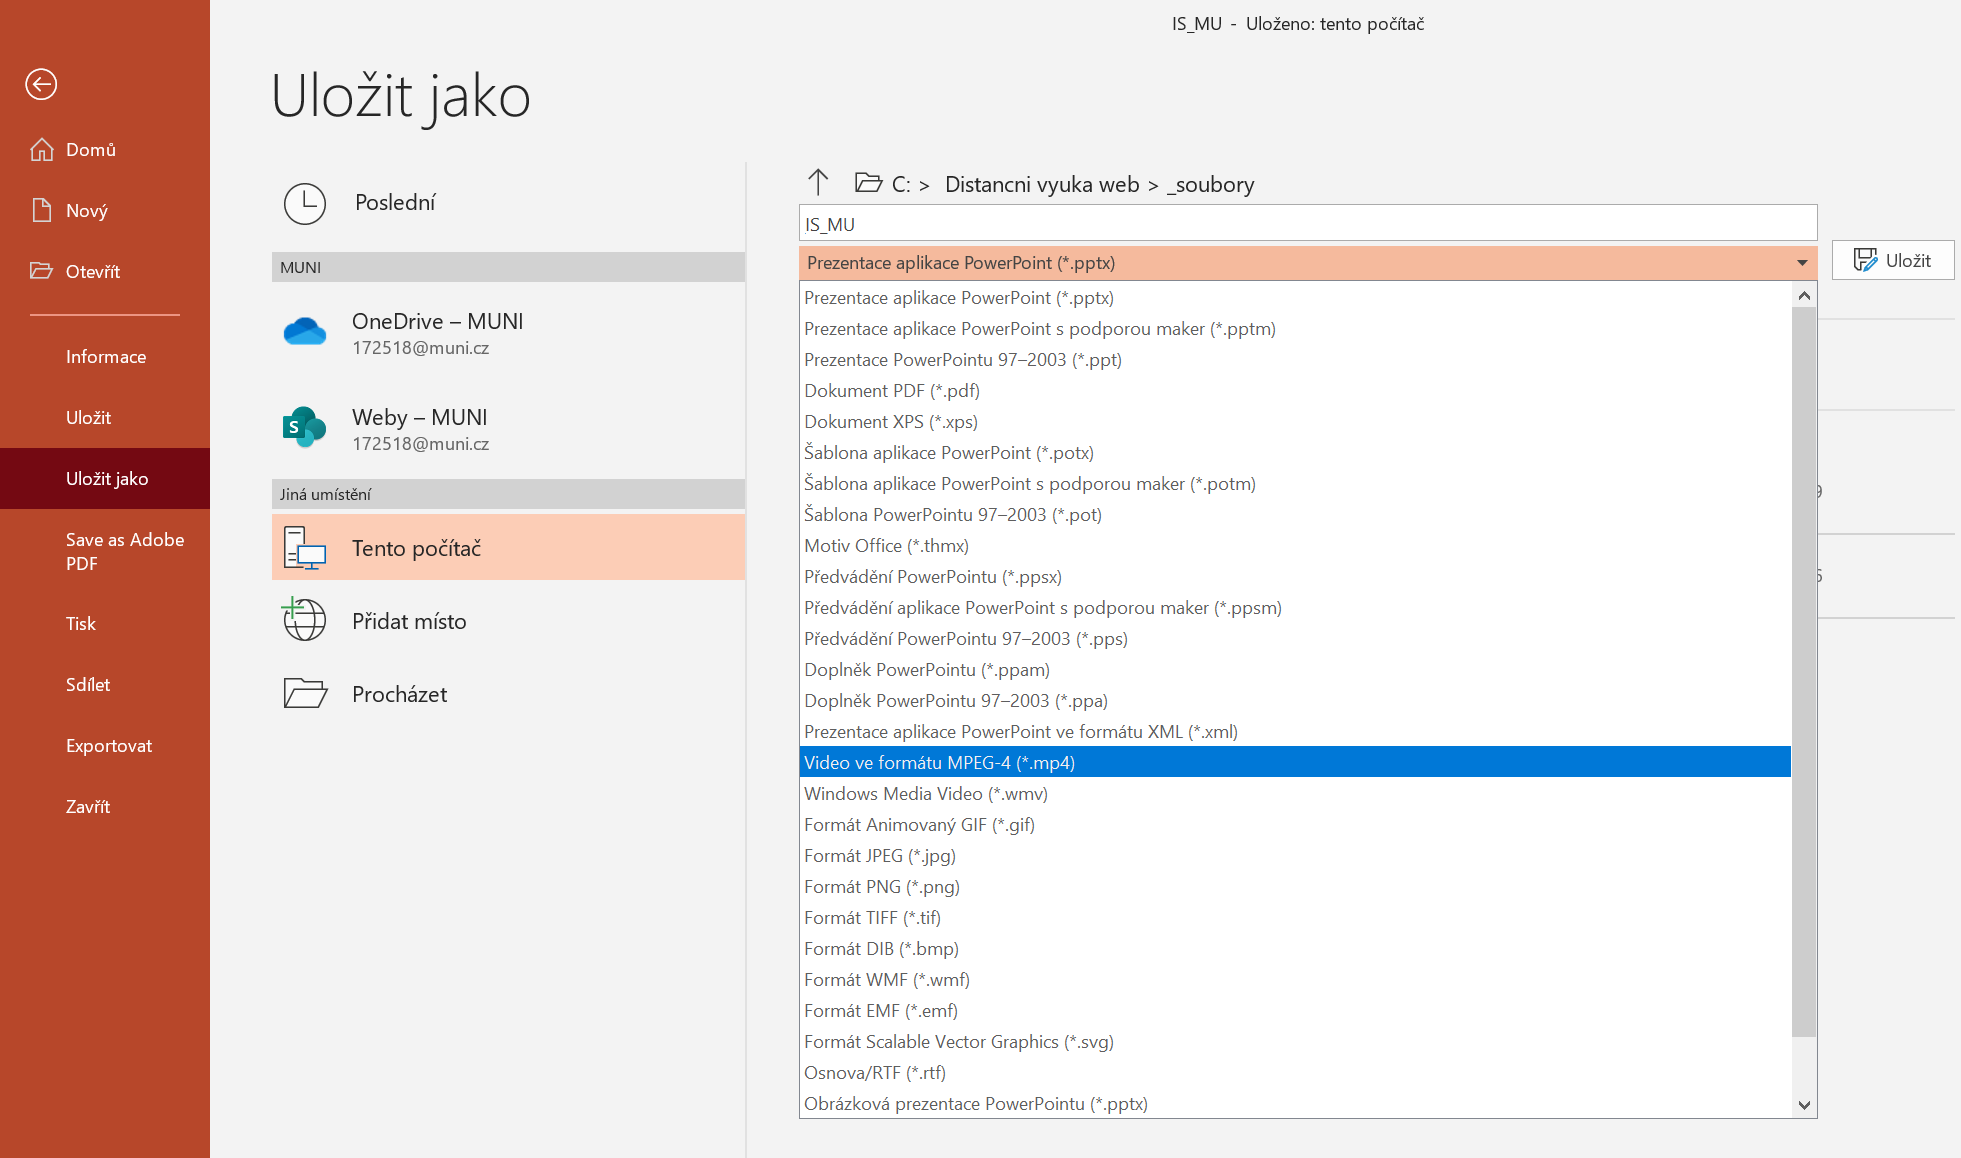
Save the presentation as a MP4 video so everyone can play the presentation without PowerPoint (File > Save as > Video in MPEG-4 format(*.mp4) > Save)
Upload the presentation (MP4 or PPTX) for the students in the course study materials in IS MU (chapter Transfering files to students).
Tips
- Make yourself a backup copy of the original lecture file
- Be aware of the possibility for longer saving time to MP4 format (depending on the PC performance it can be up to multiples of the record length)
- Send students a group e-mail with link to the presentation(chapter Transfering files to students)
- You cannot move backwards while recording the presentation(move to I want to give lecture from different program)
- Do not speak while moving between two slides
- Record a short test section and try to run it to verify the microphone's functionality and volume settings before going through the whole presentation.
- I need to draw and write
Required equipment
- Smart phone / tablet
- Pen and paper
To record video with sound use smart phone or tablet.
If you do not have suitable tripod, use whatever you have at home. You can put dining chair on the table, place bigger book over the edge and lay a smartphone/tablet on top of it.
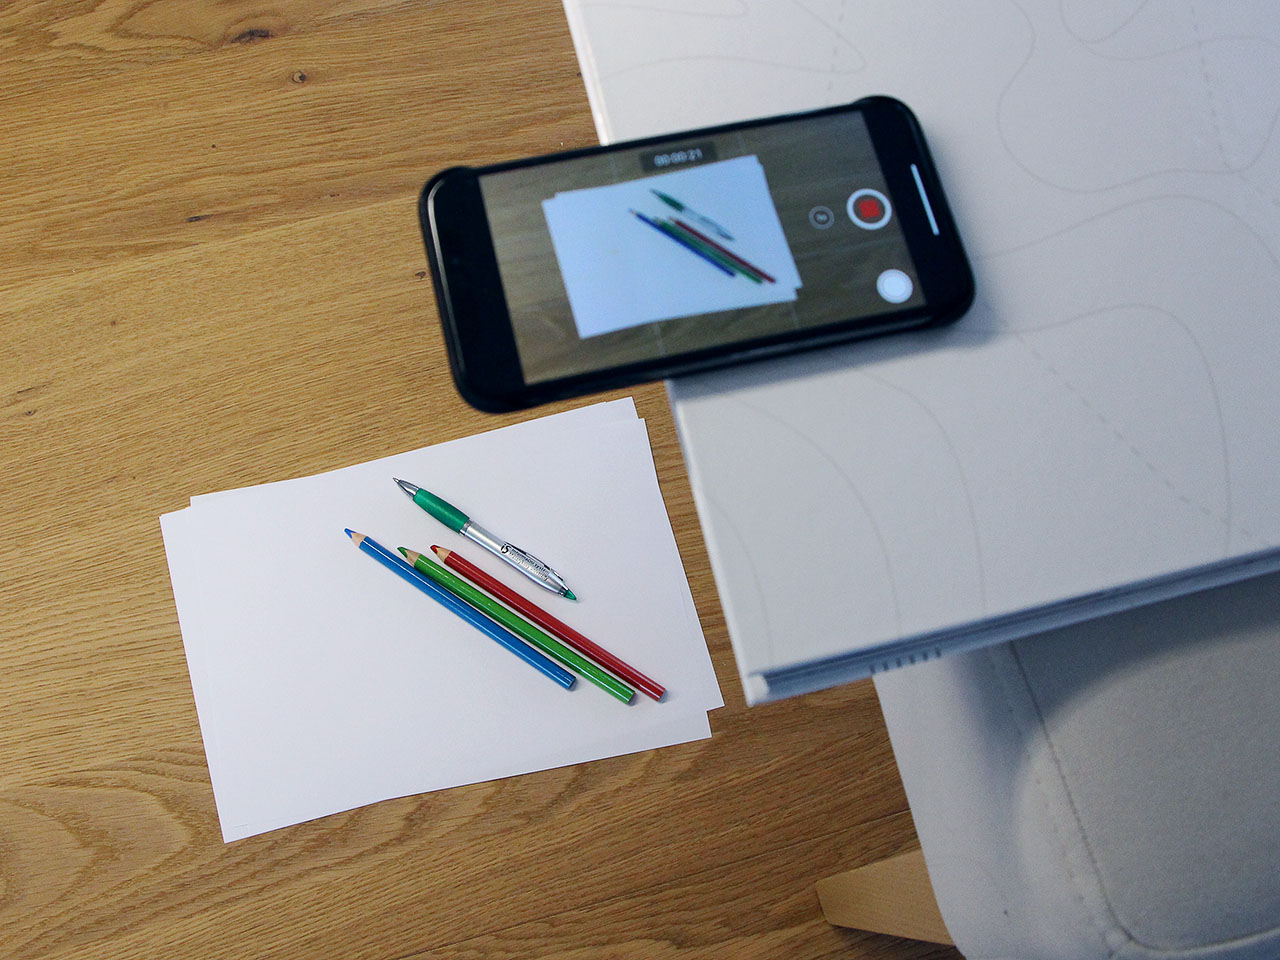
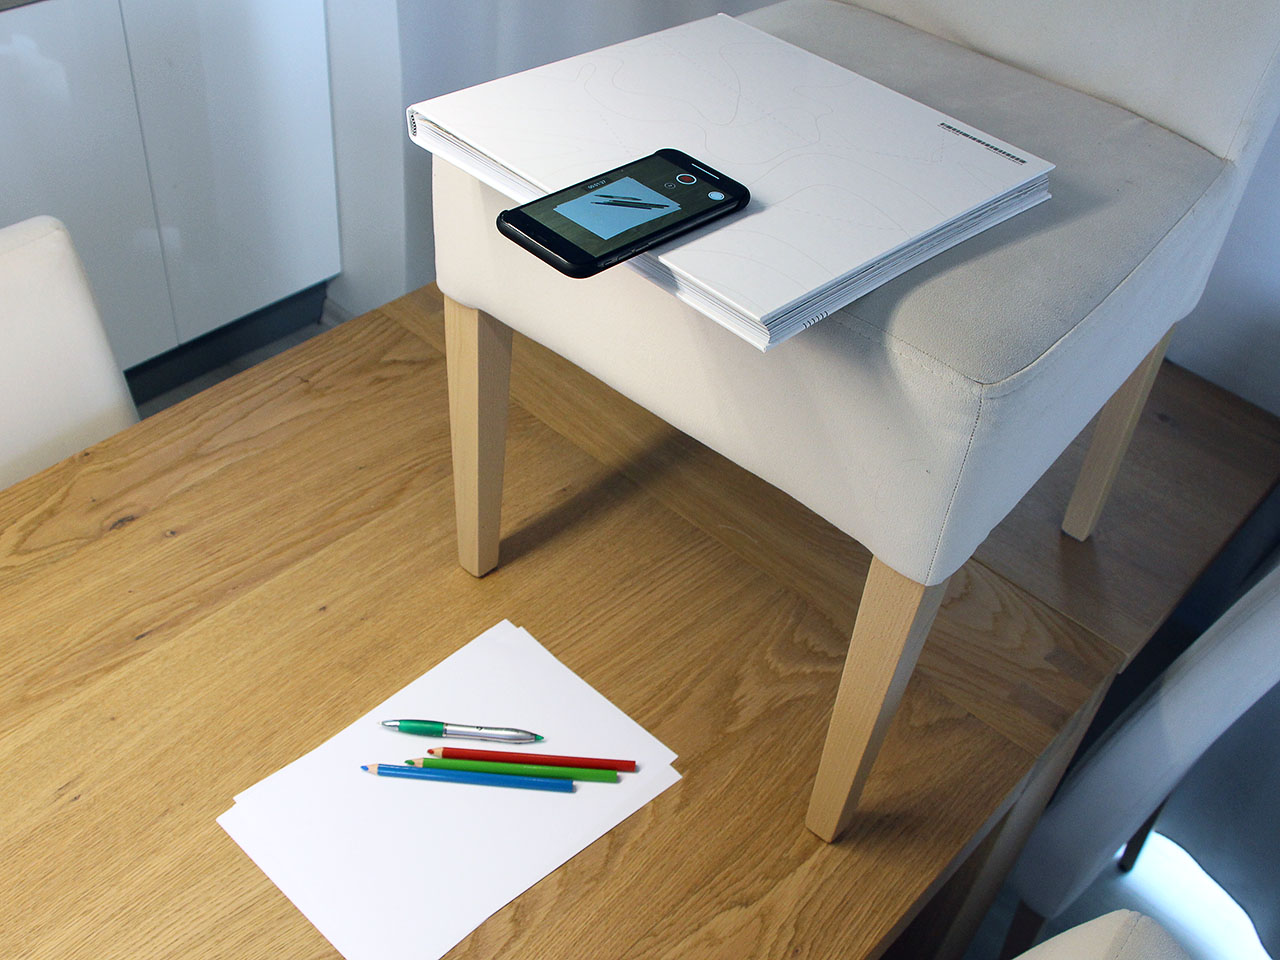
Turn on recording and you can start drawing and commenting.
Upload the finished video for students into the Study materials.
Tips
- If your smartphone/tablet has light emitting diode turn it on, you will minimize shadows around your hands
- Check the smartphone orientation before recording (you can determine it based on the icon orientation on the display) so students don’t have the video upside down
- Try recording a short test video at first, so you are sure that everything you need is visible and that sound is alright …
Example of finished video
- I need to record everything I do on my computer
If you browse through photo galleries, showcase procedures in specific programs, or browse through PDF files and comment on them, recording your desktop will be useful. We have tried OBS Studio. If you're using a Mac, you can use the pre-installed QuickTime program aswell, we're working on the instructions for it.
Required equipment
- PC/notebook (Windows, Mac OS, iOS, Android)
- Microphone (built-in, external, on headphones)
- Depending on the device and OS, you may need to install a special application
-
OBS Studio - installation and first run
You can use the OpenSource OSB Studio program (Windows, MacOS and Linux) for screen capture, which you can download from the following page
OBS Studiohttps://obsproject.com/csInstall the program, follow the on-screen instructions
Run the program after installation
The first time you run it, you will be presented with a setup wizard
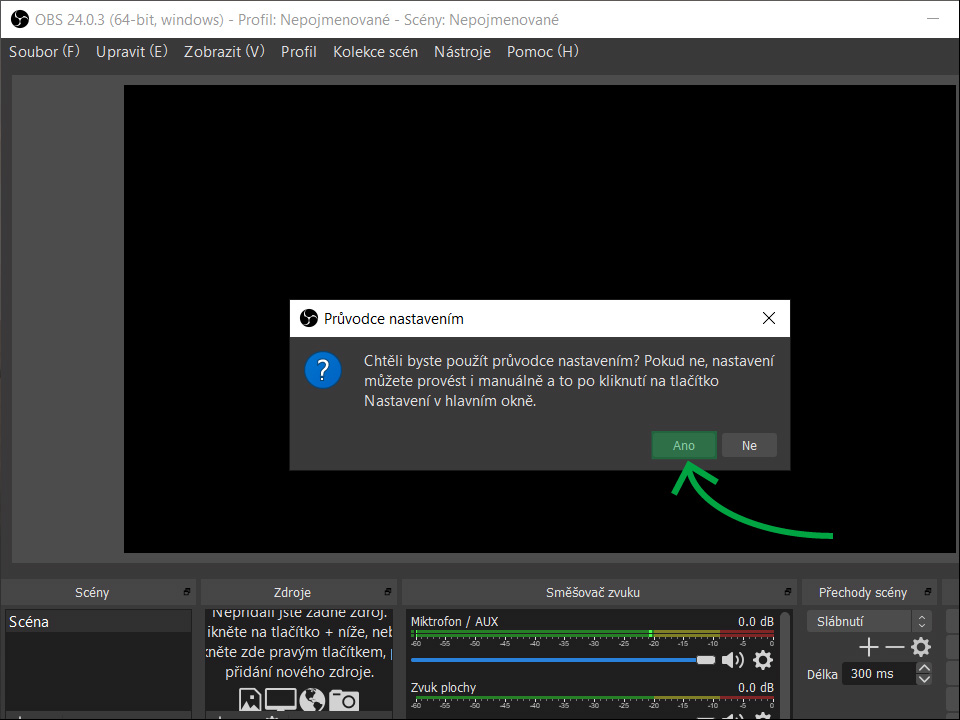
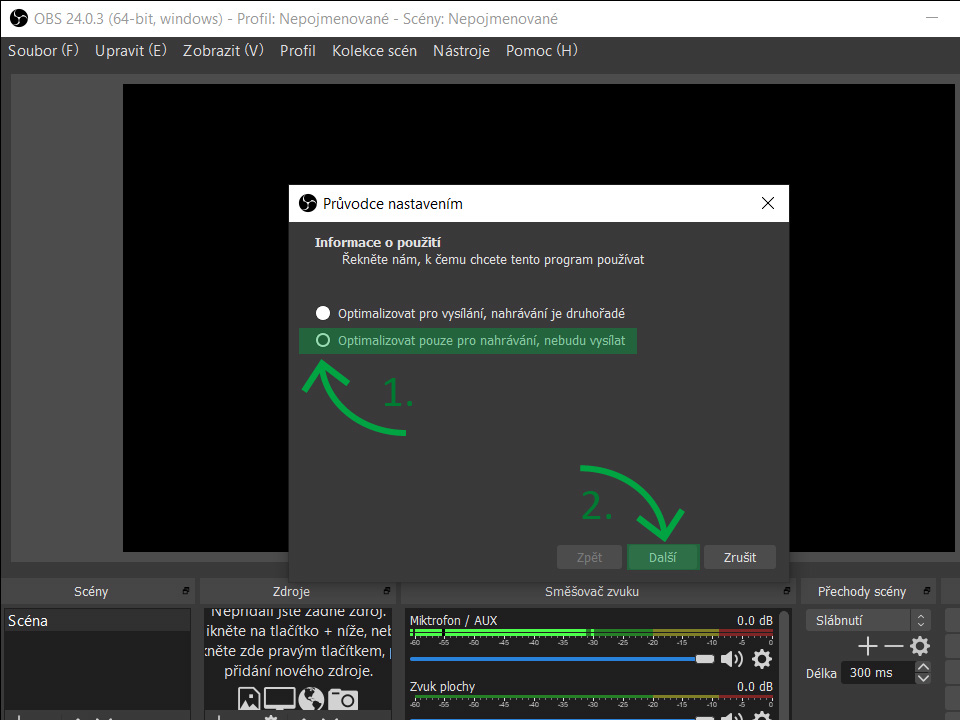
Zatrhněte volbu Check the Optimize for Recording Only option and continue through the Setup Wizard
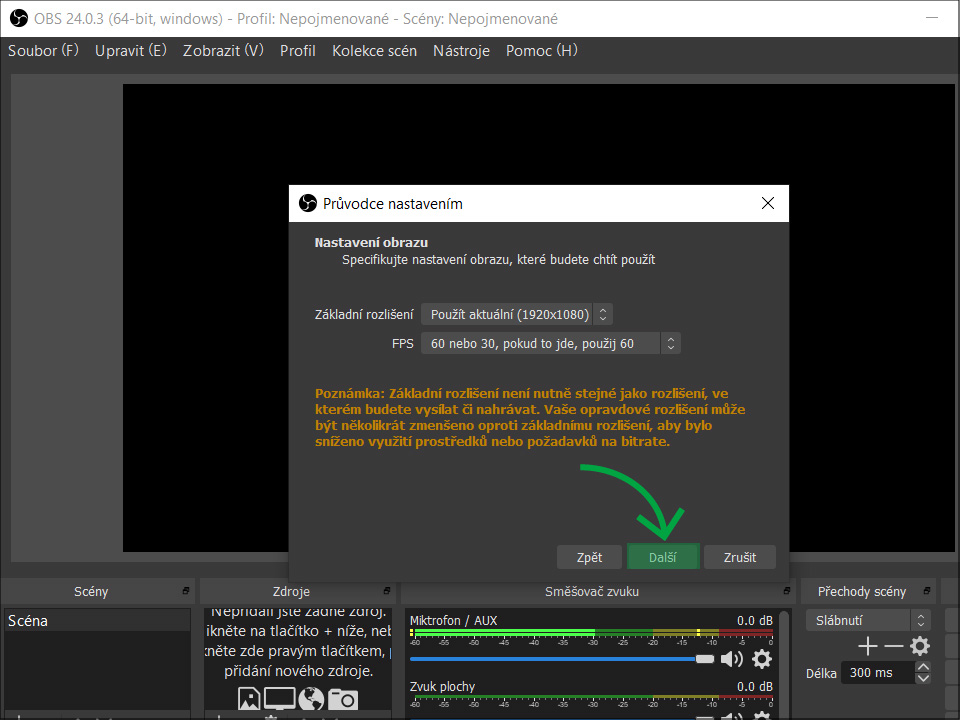
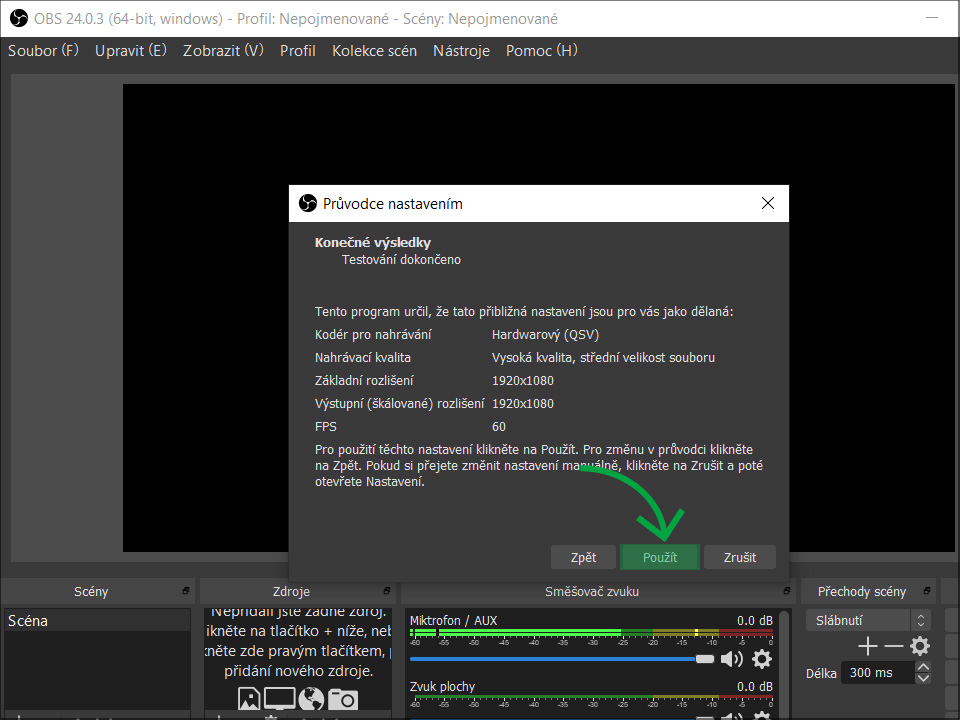
There is no need to change anything in the image settings window, just click NextFinally, click
Finally, click Applyto finish the initial program setup
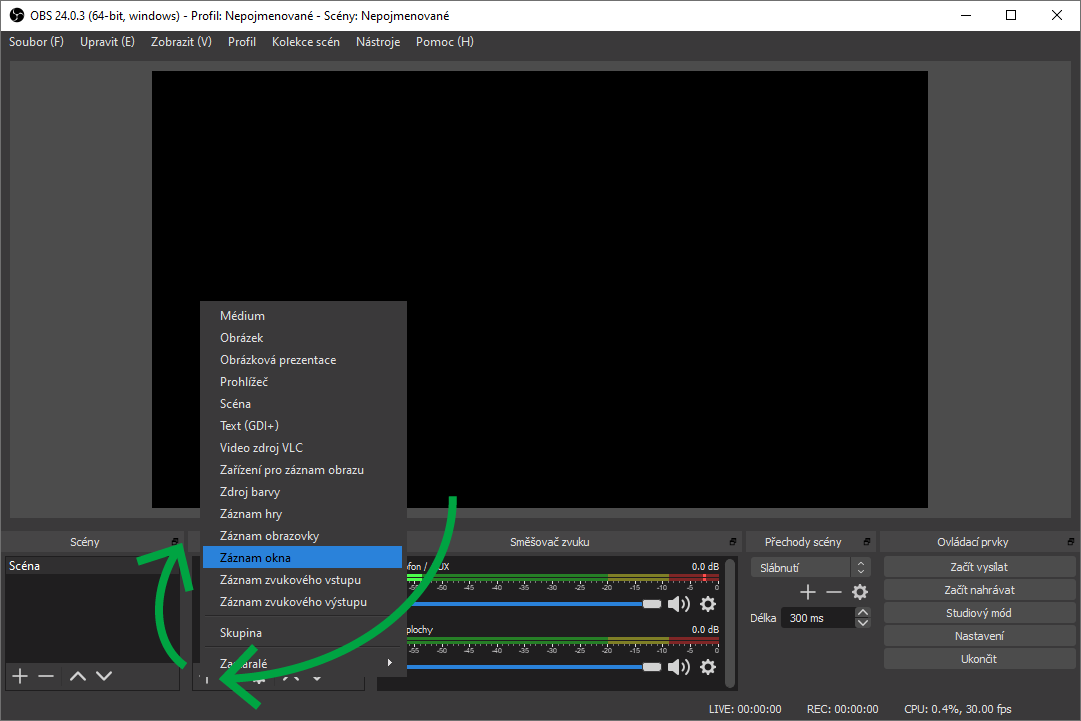
Now you need to add the recording source (full screen, program window,…)
Name the selected source and specify the type of source (what monitor, what program window)
The source appears in the list and will be remembered for future use
If you only see a black area instead of the screen preview, try the procedure described in this video.
-
OBS Studio – screen capture
Select an image source for recording, you can select multiple sources and then organize them among themselves (picture-in-picture)
Adjust the size and position of the recording source and click record
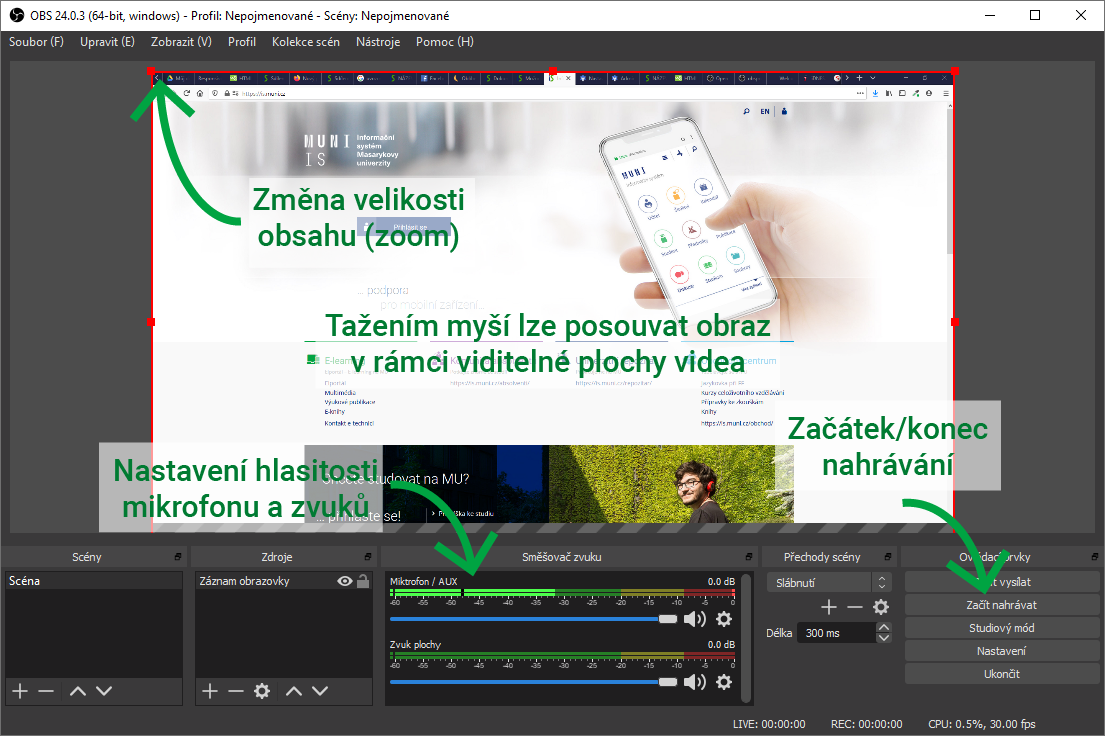
If you only see a black area instead of the screen preview, try the procedure described in this video.
Uploaded videos can be found in the Videos folder (MS Windows)
-
QuickTime for Mac - screen recording
Prepare the presentation or file you wish to talk about
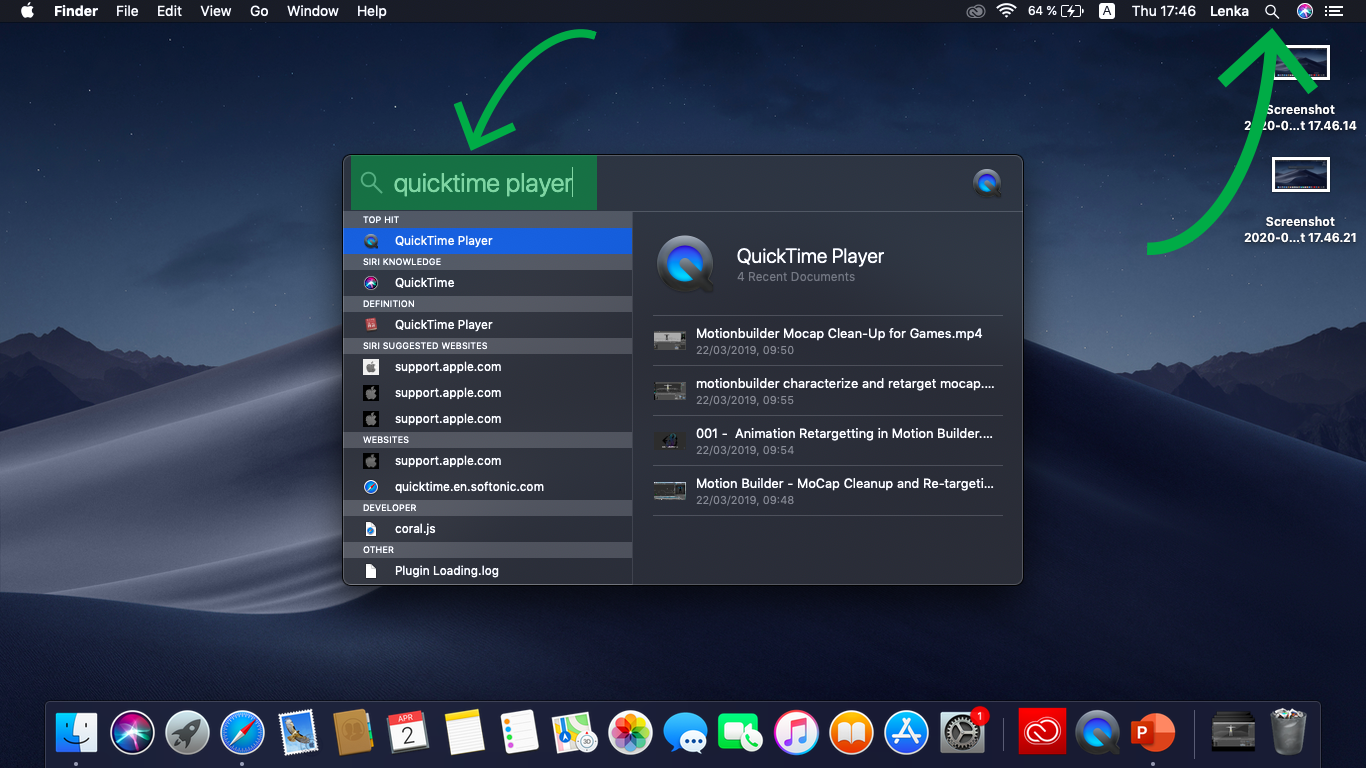
Open the QuickTime. This program is pre-installed on Mac. Find it through the magnifier glass icon (spotlight search)
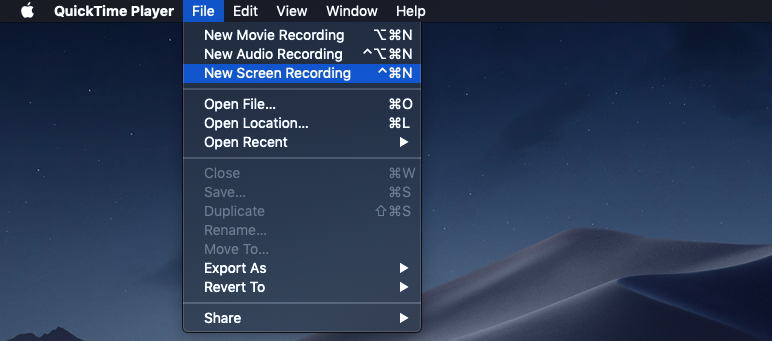
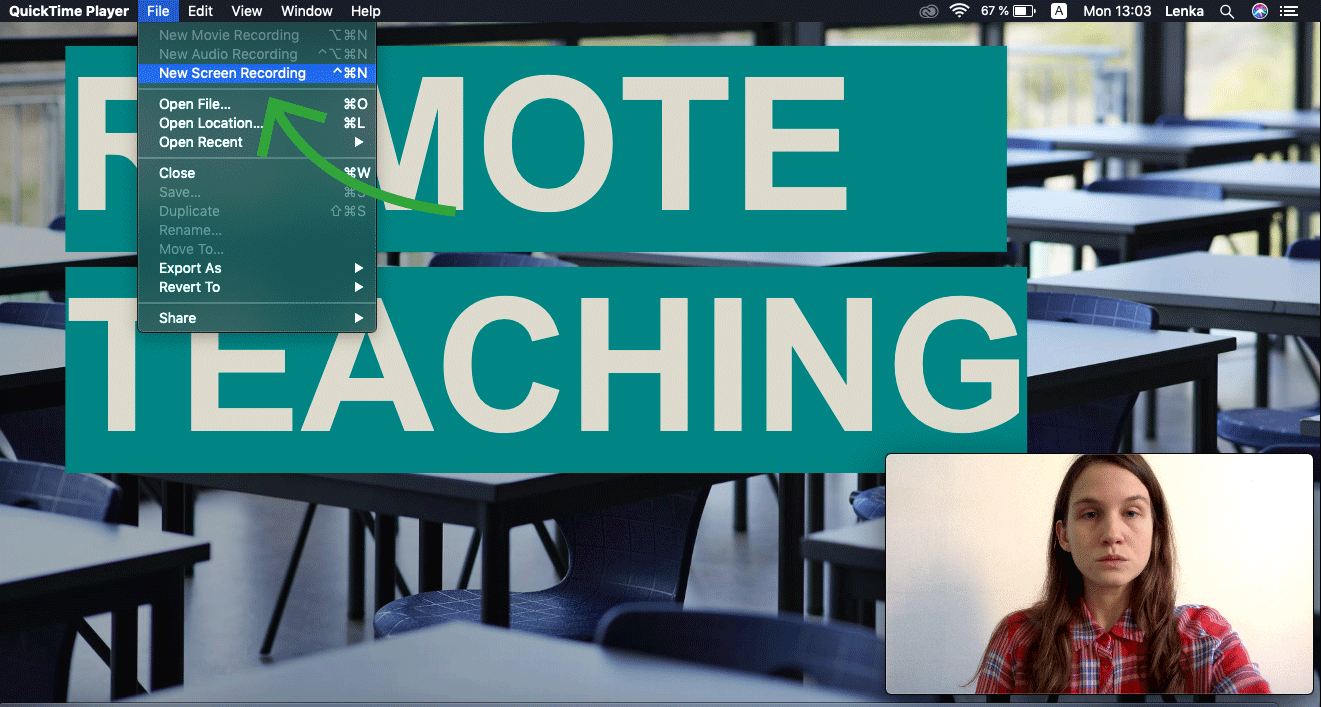
After opening the QuickTime, navigate to the upper bar and in the menu File choose the option New Screen Recording
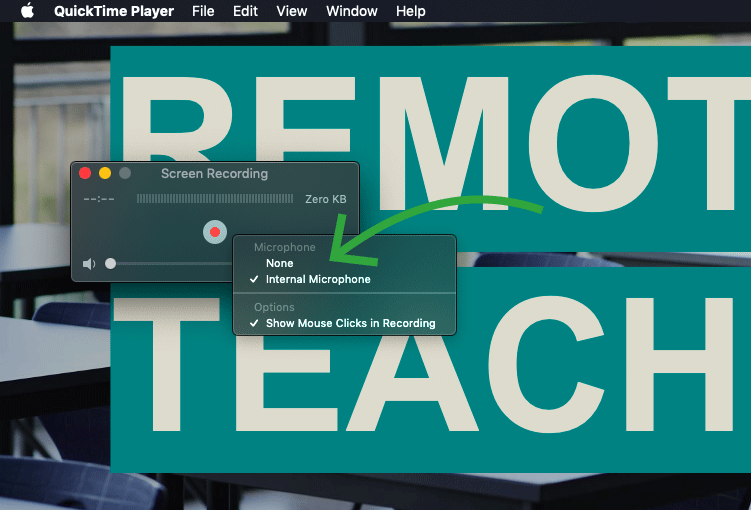
Screen recording window will launch. Click on the dropdown menu (point 1) next to the record button to choose the microphone you wish to use for recording

Then start recording by pressing the record button

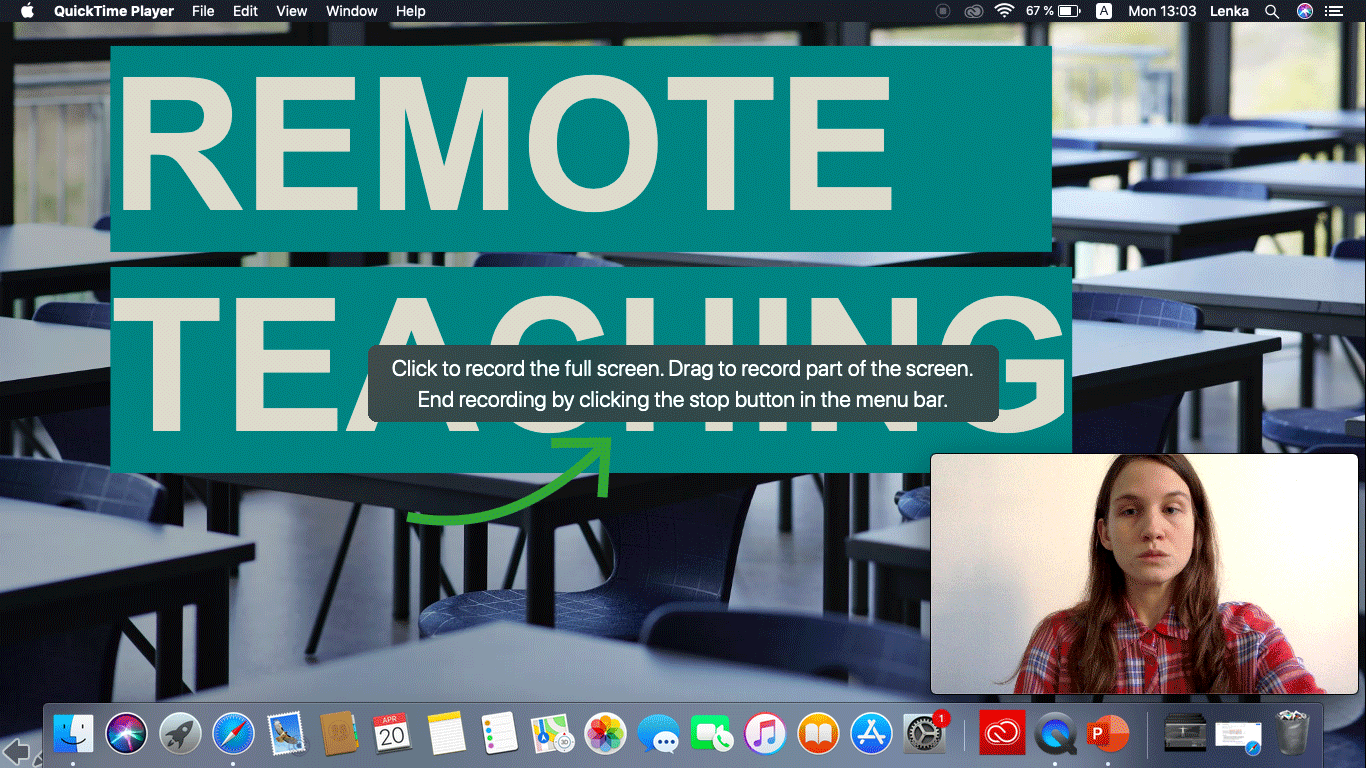
Click anywhere on screen to start recording. You can also choose just a part of the screen by draging
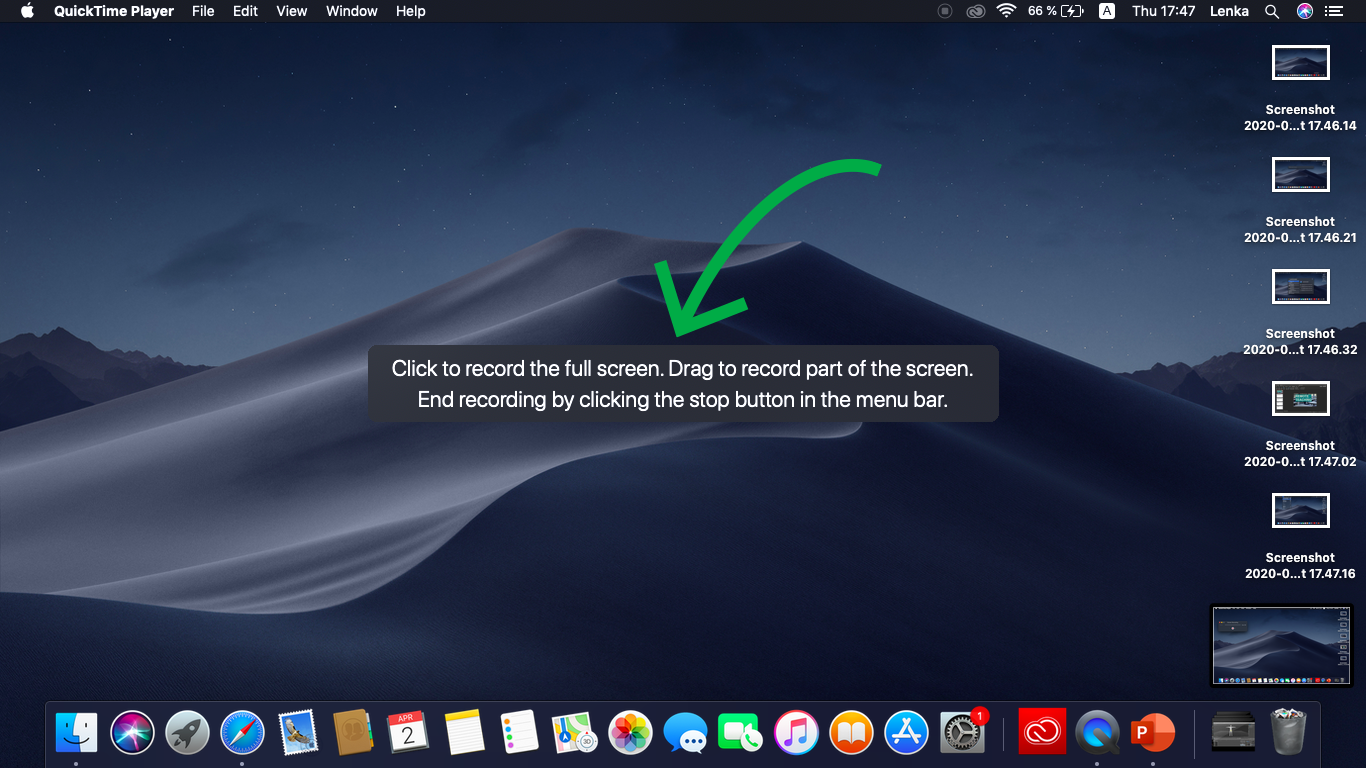
Recording is in progress, screen is being recorded
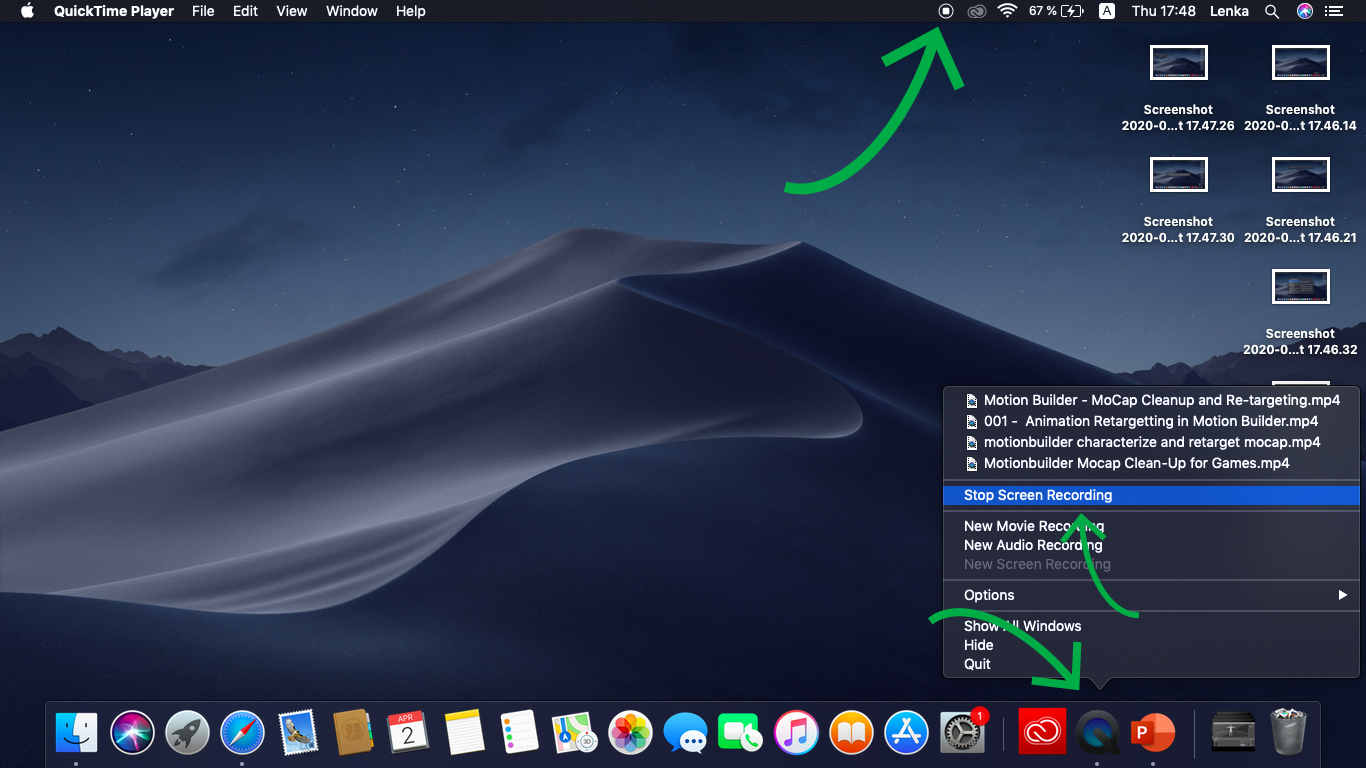
After you are finished with recording the lecture, stop the recording by pressing the Stop button on the upper bar or in the menu under the Quicktime icon ( which you can launch by double-finger click on the touchpad)
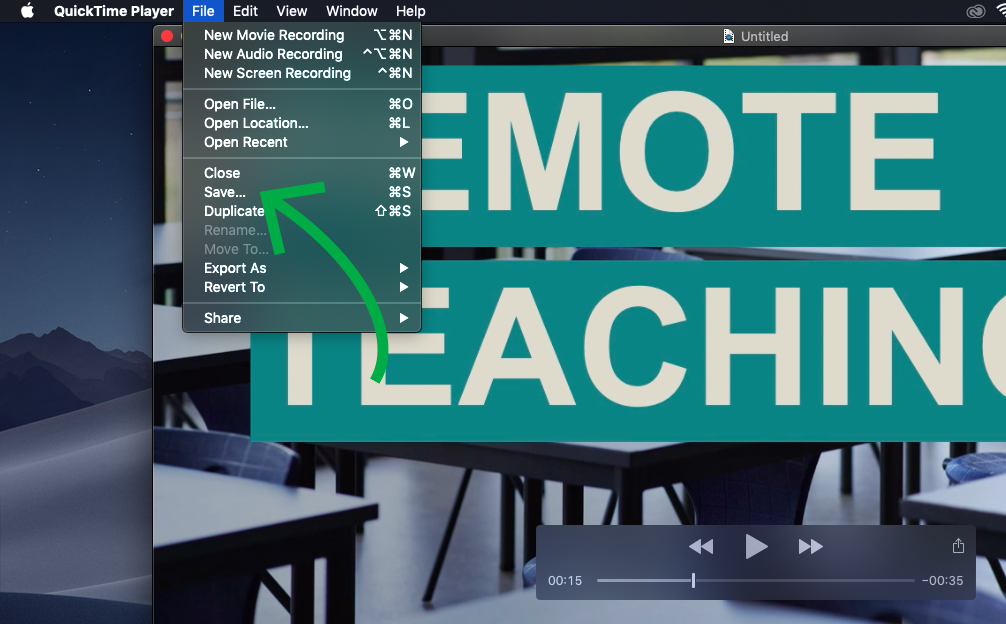
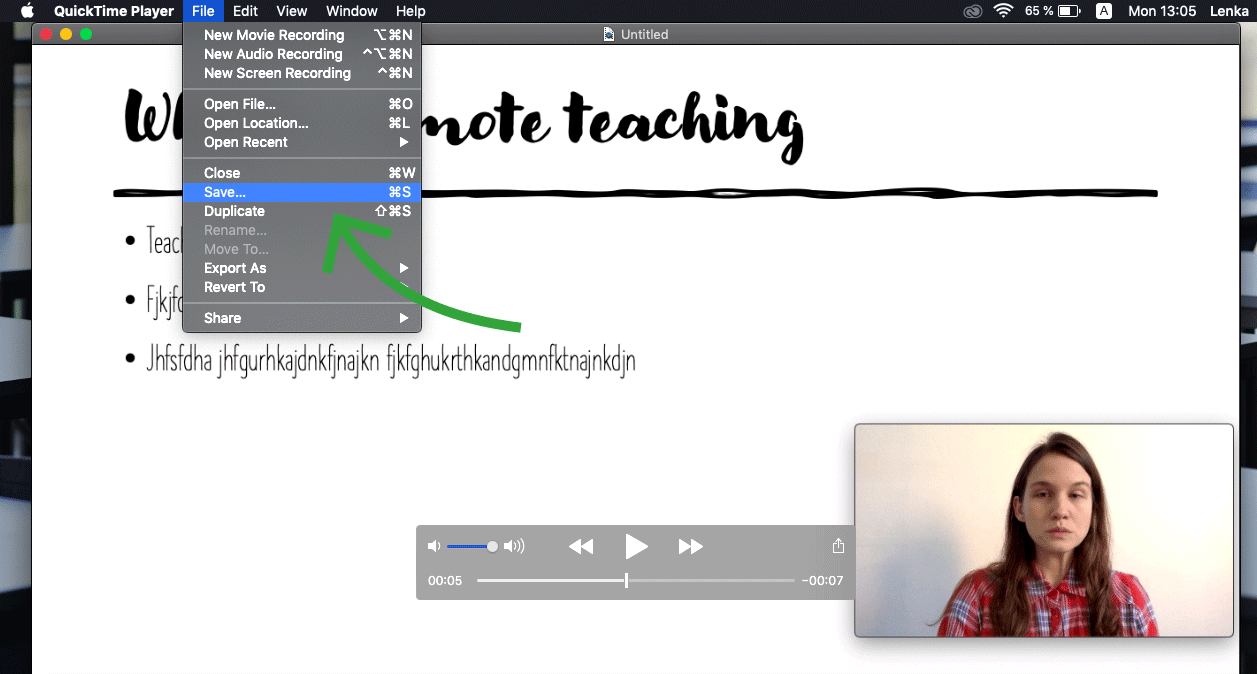
Finally, don't forget to save the recording
Tips
- We advise you to first test the recording before diving into full lecture, to make sure your microphone and it’s volume levels are set properly, so you can be heard well
- QuickTime for Mac - screen recording and video with face camera
Open the QuickTime. This program is pre-installed on Mac. Find it through the magnifier glass icon (spotlight search)
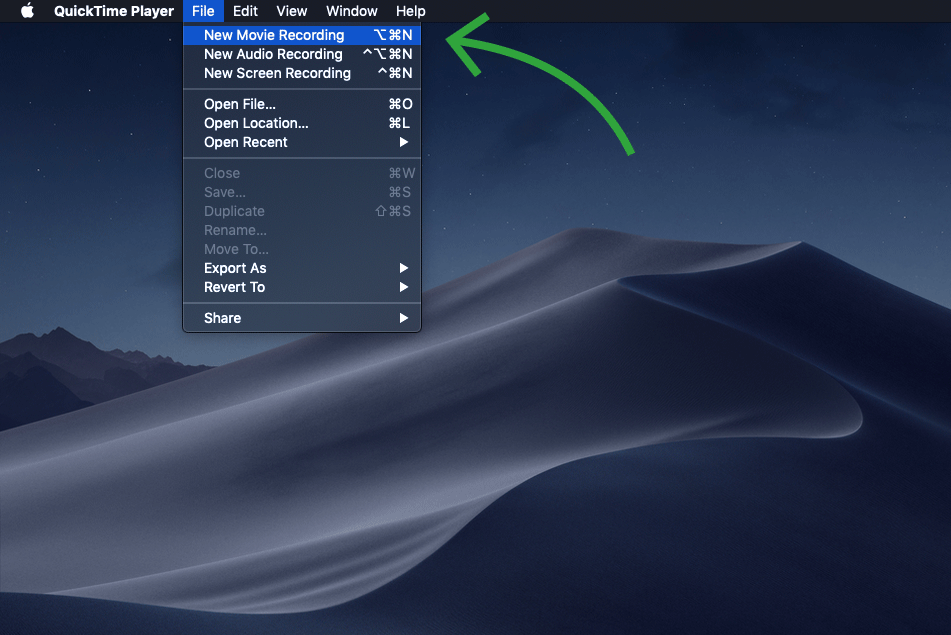
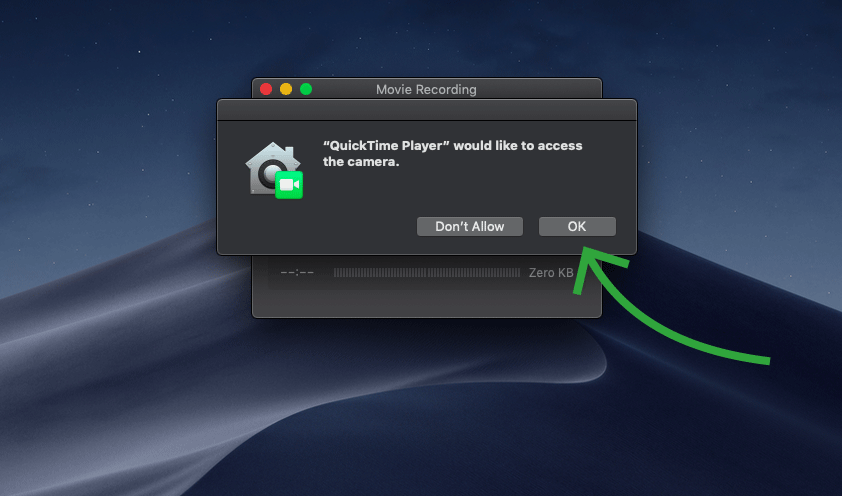
Launch QuickTime and in the menu File choose New Movie recording.
You will be prompted to allow QuickTime to your web camera.
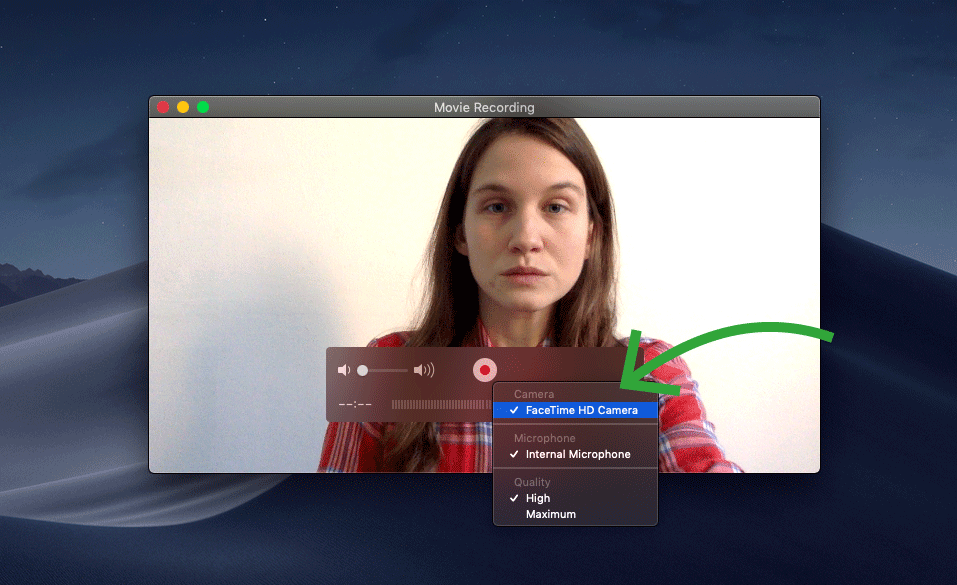
Then a window with your camera view will open, here you can choose from which camera you wish to be shown. You don’t have to concern yourself with microphone here, because this window will not be used for recording but solely to show your face.
Reduce the window size and move it to the corner of your screen. For the window to stay on top, choose from the top bar View – Float on top.

Launch your presentation before you start the recording.
Click again on QuickTime in the bottom bar and in File choose New Screen recording.
After the window appear, make sure you have chosen a microphone source here.
Start recording and on a short video test if you the sound levels are good.
Stop the recording using shortcut cmd + ctrl + esc and save it through File and Save.
Finally, don't forget to make the resulting video available to students in the IS MU (chapter Transfering files to students).
- I will use automatic classroom lectures
If you had given lecture from a classroom that can record a lecture, and the recording exists somewhere - use it. Especially if the content you taught (or your colleague who taught the subject before) is still up to date. Search for these records in collaboration with the Information Technology Department at your faculty and upload these files to students. You can spend your time consulting with students or preparing supplementary materials and assignments.
After consulting with your IT department at the faculty, it is possible to come to the classroom and record a lecture there. This can be practical if, for example, you write a lot on a big blackboard (and you don't have one at home). Not everybody can give a good lecture in an empty classroom - a situation where you cannot fix your eyes on listeners is not easy. It is good to try it in advance, or you can bring large plush toys of your children and put them in the front seats at which you can focus eye contact. Although this tip sounds funny, it really works.
Contacts on IT departments at faculties